
So you’ve recorded your vocals. Now it’s time to load them into your DAW and give them a professional studio-quality sound in your final mix.
But what techniques, effects and VST plugins should you use? And in what order? Maybe you’ve got your eye on some paid plugins, but not sure if it’s worth splashing the cash? Let’s go through the basic steps you need to know when you come to mix your music and nail that all-important vocal track.
How to Mix Vocals: Step by Step Music Production Guide
In general, there are 8 basic steps to take into consideration - and it’s best to do them in this order...
Chapters
1. Remove silence and noise
2. Volume automation
3. Autotune (optional)
4. Subtractive EQ
5. De-essing
6. Compression
6. Additive EQ
6. Reverb and Delay
Quick heads up. Every vocal track is different, so all these steps may not be necessary for you. This isn’t always the perfect solution and it really depends on the audio material you’re working with, but it's a good starting point - so keep that in mind.
1. Remove silence and noise
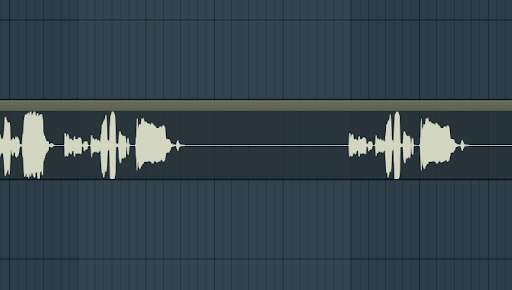
The first step is to remove the silent parts on your vocal.
There will always be breaks in your vocal track. Whether that’s a short break (e.g. when the singer takes a breath) or a longer one (e.g. during the instrumental bars). It makes sense to cut out these parts, especially during the longer periods of silence. Why? Because it removes any unnecessary noise.
A good vocal microphone will also help with this too and make your life easier later down the line.
This unwanted noise could be the microphone and your recording environment. Or if when you’re recording in a DIY bedroom studio, your mic could pick up noises from the rustle of your clothes or your feet on the floor. Even if you don’t hear them, they are there.
With a one-take recording, it’s not as much of a problem. But you’re working on a project where you’ve recorded many stems, these noises will overlay and then you will hear them. You don’t want that, so cut them out. A good way to do so is to make a fade in and fade out.
Cut out the silence, fade out the first part and fade in the next one.
Some recordings might even suffer from electrical noise. This noise occurs due to technical aspects, like the quality of preamp your sound card uses or the quality of your microphone. It won’t only occur in quiet parts, but on the whole length of your recording and usually audible throughout, even if it is quiet.
To remove it, you can use a denoise plugin. Nearly every DAW offers a free one, in Fruity Loops you can use “Edison” for example.
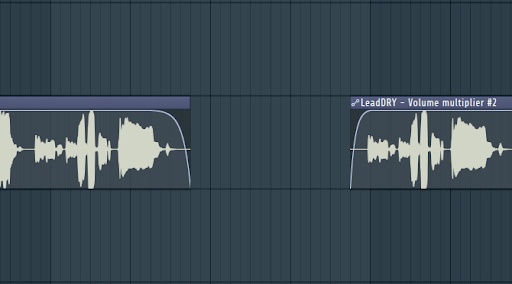
2. Volume automation
It’s only natural for a vocalist to sing different parts with different intensities. So it’s sometimes worth adjusting the volume of a vocal, either automatically or manually.
This is often necessary for hard sounding sibilances like “P” and “S”, but also it could be worth doing on any section of the vocals that you think sound better spoken quiet or loudly.
Depending on the sound you’re trying to achieve, you can manually edit these parts by turning volume up or down by automation.
This will have a big impact on how your plugins will have to react and work afterwards. For example, a compressor will have to work much harder if there is a big difference between quiet and loud parts. By adjusting your volume levels now, you’ll not only influence the perception of the listener, but also what your plugins will be doing later in the mixing chain.
3. Auto-Tune (optional)
Some artists use autotune as a creative element. Others simply because they can’t sing. Autotune isn’t a required element in your vocal mixing chain, so it’s up to you if you want to use it or not.
A good paid plugin for autotune is Antares Auto-Tune Pro. A nice free one is the Graillon 2 free edition by Auburn Sounds.
For more options, check out our list of the best free autotune plugins you can use in 2024!
4. Subtractive EQ
Now we come to EQing. Subtractive EQing to be precise, which concentrates on lowering frequencies, not adding them.
In this step, you can cut off the unwanted low frequencies below 120 Hz, you can lower some upper mid frequencies (around 250-400 Hz) or just sweep around with a high Q on your filter to find the annoying frequencies and turn them down.
To do so, make a bell filter with a very high Q and a big boost (like +10db). Then swipe around the frequency spectrum and whenever you find an annoying sounding frequency, just turn the +10db boost into -3/-4 db to cut out the annoying frequency (see below).
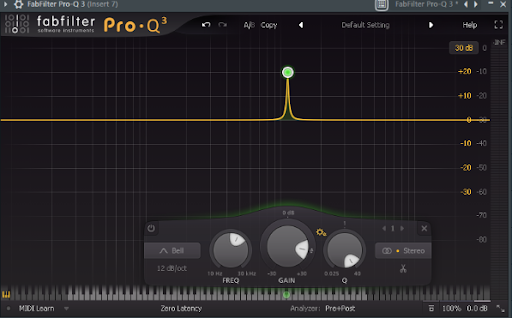

I use the Fabfilter Pro Q3 plugin here. If you want a good free option, I recommend the TDR Nova equalizer.
5. De-essing
The purpose of de-essing is explained by the word itself. It should eliminate hard and harsh “S '' sibilancies.
With most plugins you’ll have to set a frequency area to let the plugin know where it will find the harsh “S” frequencies. This is mostly between 7kHz and 14kHz. Furthermore, you have to set a threshold to let the plugin know at which volume level it should reduce the sibilancies.
This really depends on your vocal and you have to find a specific value for your audio material.
A good de-esser is Fabfilter Pro DS, but if you want freeware, use Lisp by Sleepy-Time DSP.
6. Compression
Compression is one of the most discussed topics in music production - and for many producers the scariest one too. That’s because there's no perfect recipe for setting up a compressor. Its settings really depend on the audio you’re working with and the purpose of the compression.
In general, a compressor is used to reduce the dynamic range of audio material. Dynamic range describes the (volume) difference between the quiet and loudest parts of your audio. In many cases you’d want to compress audio material so it’s easier to work with later on.
So, do vocals need compression? YES! As I already mentioned, singers tend to go quieter and louder while they are singing - that’s known as dynamic range. To lower this dynamic range and to get a more equal loudness, we need compression.
The setup of parameters and knobs will be different every time. So while I can’t give you a perfect solution, but I can give you some starting points:
- A ratio of 4:1 often works well for vocals.
- Don’t set the attack too fast, this will distort your audio.
- If your plugin offers oversampling, use it. It allows the compressor to work more accurately.
- Aim for a max of 8db of gain reduction.
- Fast/medium release often works fine.
A good plugin is Fabfilter Pro C2 and a good freeware is TDR Kotelnikov.
7. Additive EQing
Additive EQing is the opposite of subtractive EQing. We focus here on adding frequencies.
It’s always a good idea to make a “high shelf'' and boost the frequencies above 10kHz.
Sometimes it’s also worth boosting to 3kHz too, as that’s the frequency our ears are most sensitive to.
8. Reverb & Delay
The last step is to add reverb or/and delay to create a feeling of room and space. Delay isn’t always necessary, but it can be used as a creative effect.
You now have to decide if you want to set the reverb as an insert or send effect. If you don’t know what a send bus is, google it! It’s too much to explain in this article. I’d definitely suggest you set it as send bus effect because you will have much more control over the plugin then.
A good free plugin is TAL Reverb 2, but you can use any other plugin too, for sure.
About the author
Hey, I am Marlon and I am the founder of the Producer Academy on Instagram, a learning platform for music producers like this one from Ditto here. If you want daily music production tips and a personal teacher who answers your questions (for free) and you liked this post, visit me on Instagram.


Join the conversation