When it comes to mixing your own music, there’s a couple of basic things that every great producer needs to know.
You might have heard of what seems like an endless list of mixing terms and techniques - compression, EQ, saturation, reverb and delay, and so on and so forth. But what do all of these things mean? And more importantly, how can you use them when it comes to mixing your own audio material? Read on to find out...
How to mix music: 7 essential tips
Let’s imagine you have an instrument, and you want to mix it: what would that look like? How would you do it? Where would you start?!
In the following steps I’ll give you an example of what a mixing chain could look like.
The reason I say ‘could’ is because there’s no single recipe or one-size-fits-all method when it comes to mixing. There are only steps that are often used, but these are very much dependent on the individual piece of audio material in question, whether that's mixing vocals, mixing drums, mixing guitars or anything else.
But nonetheless, here’s 7 of the most-used steps that you can use to start mixing, plus some great free music production plugin options!
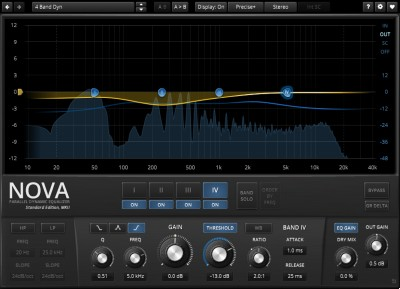
1. Corrective EQ
As you may have already guessed, one of the first most common steps when it comes to mixing is all to do with EQ. What’s special about this step is that we focus ONLY on using the EQ to reduce frequencies, rather than boosting anything (which will come later).
You could say then that the overall aim of this step is to remove all unnecessary frequencies we don’t need.
Important to remember: Think of the context your sound will play in. Never EQ it in “solo mode”. Even if your audio sounds really weird while playing solo, it might still sound good in context, and that’s what’s most important.
Does your sound really need the low-end frequencies, or is there already a bass playing? Think like this the whole time. And don’t cut off too much as this will just sound unnatural in context.
Free Plugin Option: TDR Nova EQ
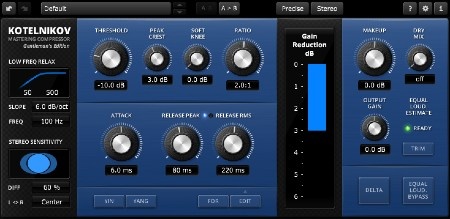
2. Compression
Compression is one of the most hated topics amongst music producers and DJs because many producers don’t know its purpose or simply use it every time they mix.
But is that needed? No!
Compression reduces the dynamic range of a signal. What does this mean?
For example, let's talk about mixing guitar audio. Imagine you record a friend with a guitar. He is finger-picking a self-made song. While recording, he hits the strings of the guitar with different velocities, and this results in a recording with parts which are loud and others quieter. That is what dynamic range describes: the difference between the quietest and loudest parts of a sound/recording.
So, recordings with higher dynamic ranges will need some compression, in order to make the recording “smoother”. The settings in the compressor will highly depend on your audio material, so make sure you know what the knobs do before you use them.
Free Plugin Option: TDR Kotelnikov
3. Additive EQ
In step two - additive EQing - we focus on only adding missing frequencies. But which frequencies are missing? Well that’s up to you. Just rely on your own ears, your own musical taste and what sounds natural to you.
Professionals mixing engineers often give a boost of around 3khz, because that’s the area our ears are the most sensitive to. Adding a boost around 300-500 Hz can add “warmth” to your sound if that’s what you desire. Another way is to add a boost above 7khz to add some “air”.
Trial and test all of these approaches, but decide every time if it’s really making your sound recording sound better in context.
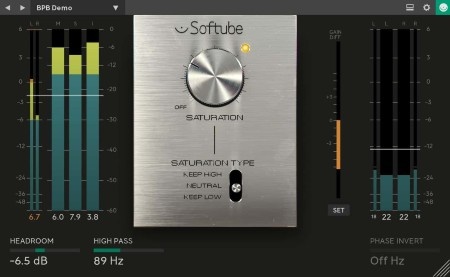
4. Saturation
This step is optional. Not every sound will need saturation. And in fact on some sounds, this may sound awful.
Why?
Because saturation will add frequencies you may have already added. But some producers swear that “it could colour a track in a pleasant way”, so my tip is: trial and error. You will notice if saturation sounds good on your audio material or not. But don’t overdo it. This can completely mess up the sound if you do it wrong.
Free Plugin Option: Softtube Saturation Knob
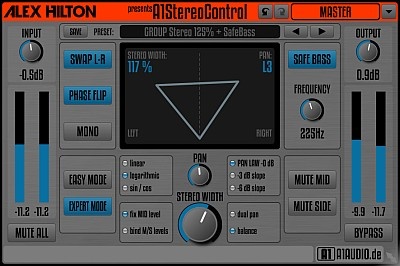
5. Stereo Image
You may have heard that it is important to set the sound's position in the stereo image, and that is right.
By separating them from each other, you give them more space to “breathe” and a better stereo image to your listener, making it easier for him/her to localize single sounds in your track.
You can do that by either panning your audio to left or right or by placing them mono or more stereo.
Free Plugin Option: Alex Hilton A1 Stereo Control plugin
6. Reverb & Delay
Reverb & Delay are creative effects. They aren’t needed every time, especially the delay.
Be careful with it: used too often, the delay could overlay with other delays and this will sound “sludgy”. Same goes with reverb - used too strong or with an oversized decay, it will make your song muddy.
Because of this, mainly use your reverb for giving your track/and the single sounds in it a feeling of room, so it doesn’t sound dry. Our ears are used to hearing everything in a room context, therefore reverb can sound amazingly good if it’s used right.
A big advantage is to use one or more reverb “send busses” in your project, for example, one with a bigger and one with a smaller reverb. And if you don’t know what a send bus is, find out here!
7. Volume
Finally, recheck the volume of your sound. You may notice that it is much louder now, with all the effects on it, than it was when it was dry. So make sure you check if the volume is okay in context or if it’s too loud.
More basic audio mixing tips...
of Now you’ve got a good grasp of all the potential steps you could use to start making mega mixes, here’s a couple of other really important things to bear in mind - beyond the actual mixing techniques.
These are more just general tips and things you should have a look on before and while you mix.
These simple hacks will save you a lot of time and problem solving and are recommended by many well-known producers and artists.
Room acoustic is important
Many producers start mixing their first tracks in their bedroom. And while there's nothing wrong with this, you should consider some things if you’re going to do the same.
Bedrooms are often full of flat surfaces, like furniture, parquet floor, glass tables, windows and more. These surfaces tend to reflect the sound of your monitors, and this will lead you to make wrong mixing decisions.
Why? Because the reflections will give you wrong impressions of the sound you hear.
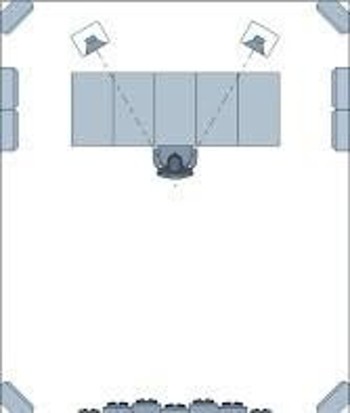
How to avoid that? Get something to cover them. Even if it's an old blanket. If you have some more money to spend, try to find some good diffuser elements on the web as they’re designed to absorb sound.
This is what it typically looks like:

Place them behind your monitors (they reflect to their back too) and in the back of your room, where you think the sound will touch the wall. Place some bass absorbers - “bass traps“ - in every corner of the room.
Now your room is acoustically treated well, and you have a big advantage for making better mixing decisions.
Don’t underestimate this step - I did that for three years and really regretted it.
Organize your audio mixing sessions
You may think: “Why the hell should I do that? I only have 10 tracks inside my project.”
That’s right, but with time you will notice your projects getting bigger and bigger (depending on your genre too). And it’s easy to quickly lose an overview of the project. Because of that, I recommend you do the following:
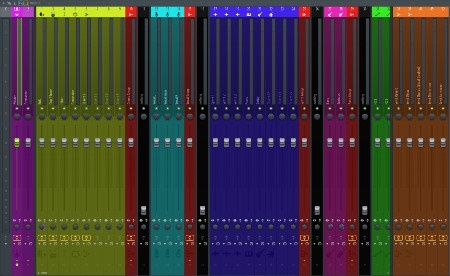
1. Make a mixing template for your DAW
It doesn't need to be perfect at the beginning - you can develop and complement it over time. But this will save you so much time in colouring tracks, making groups in your mixer and more.
This is what mine looks like:
2. Sort your samples
Make a “favourites” folder and sort them by their genre. Give them better file names and more.
3. Make a “Mixing & Mastering Step List”
Much easier to develop a workflow with that if you ask me. Which steps should be done first, which ones maybe later?
Make time for breaks
This may sound self-explanatory, but it isn’t for all producers.
Breaks are really important, not only to refill your creativity, but for refreshing your ears too.
Our ears tend to get used to failures. For example let’s say you mix a bass heavy track and you edit the bass with an EQ. But you’ve already been there for the past two hours mixing this project. Next time you open it, you notice that you boosted the bass way too much. That’s because you made a wrong mixing decision (which is normal to happen sometimes). You were listening to it for so long, your ears got used to this failure.
So remember, make time for a break at least every 60 minutes.
Use reference tracks
Using reference tracks is crucial for making better mixing decisions.
But what is a reference track? It’s a track made by another artist, which is matching with your track in terms of genre, energy and style. You can use it to hear what the other artist did to make it sound good, compare the frequency balance, analyse the arrangement and the loudness. This will make your productions sound much more professional over time.
It’s a really broad topic though, so you will have to learn different techniques to analyse the things mentioned above. I can’t go too deep into this topic here (it could be a whole other blog post of its own), but if you want to learn more, just search the web and Youtube. A good video to start with is this one by “In the Mix” .
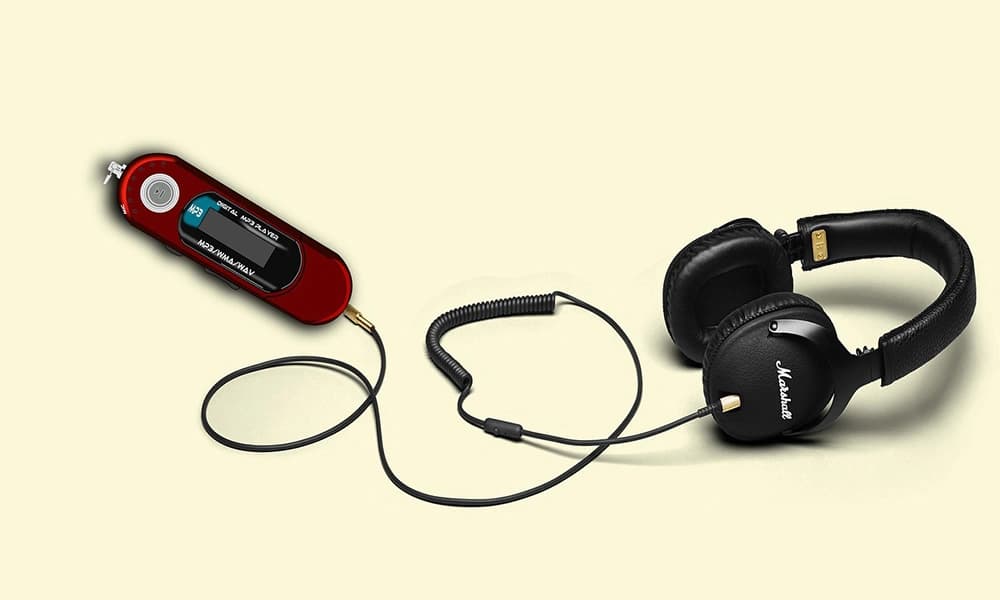
Check your mix on different devices
Checking your mix on as many different devices as possible is necessary to make sure it will work in as many acoustical and technical circumstances as possible.
Not all speakers are as flat sounding as your mixing monitors. Hearing your track on headphones is different than hearing it on speakers, right? And hearing it on even smaller iPhone speakers is different to bigger headphones.
Other speakers won't work in stereo mode, but in mono. Does your mix work well while hearing it in mono? The only way to find out is to hear it through a mono speaker (or by emulating a mono signal in your DAW).
This gives you the advantage of adjusting the “weak points” of your mix before you publish it.
Here’s where to check your mix:- Your mixing monitors
- Other speakers not made for mixing
- Bigger headphones
- Smaller headphones (e.g. in-ear iPhone )
- Car
- Small bluetooth device
- Hifi speakers
- Radio
- Your mobile phone speakers
For sure the mixing techniques you can use aren’t limited to these, but they do represent the most used steps and are very common ways to edit your sounds.
Remember - every situation may need a different edit, depending on the sound.
Author Bio
Hey, I am Marlon and I am the founder of the Producer Academy on Instagram, a learning platform for music producers. If you want daily music production tips and a personal teacher who answers your questions (for free) and you liked this post, visit me on Instagram.


Join the conversation